Planning a kitchen layout can feel like a high-stakes game of Tetris, especially when you're working with a small space. It’s easy to get overwhelmed by the options, or worse, make a costly mistake that leaves you with a kitchen that’s more frustrating than functional. But a small kitchen doesn't have to feel like a compromise.
Think of this as your friendly, step-by-step framework. We’re going to walk through how to measure your space, understand the fundamentals of a good workflow, choose the right layout, and uncover some clever tricks that make your kitchen work harder and feel more spacious. Let's get that coffee brewing and start planning.
Before You Begin: Measuring Your Space and Your Needs
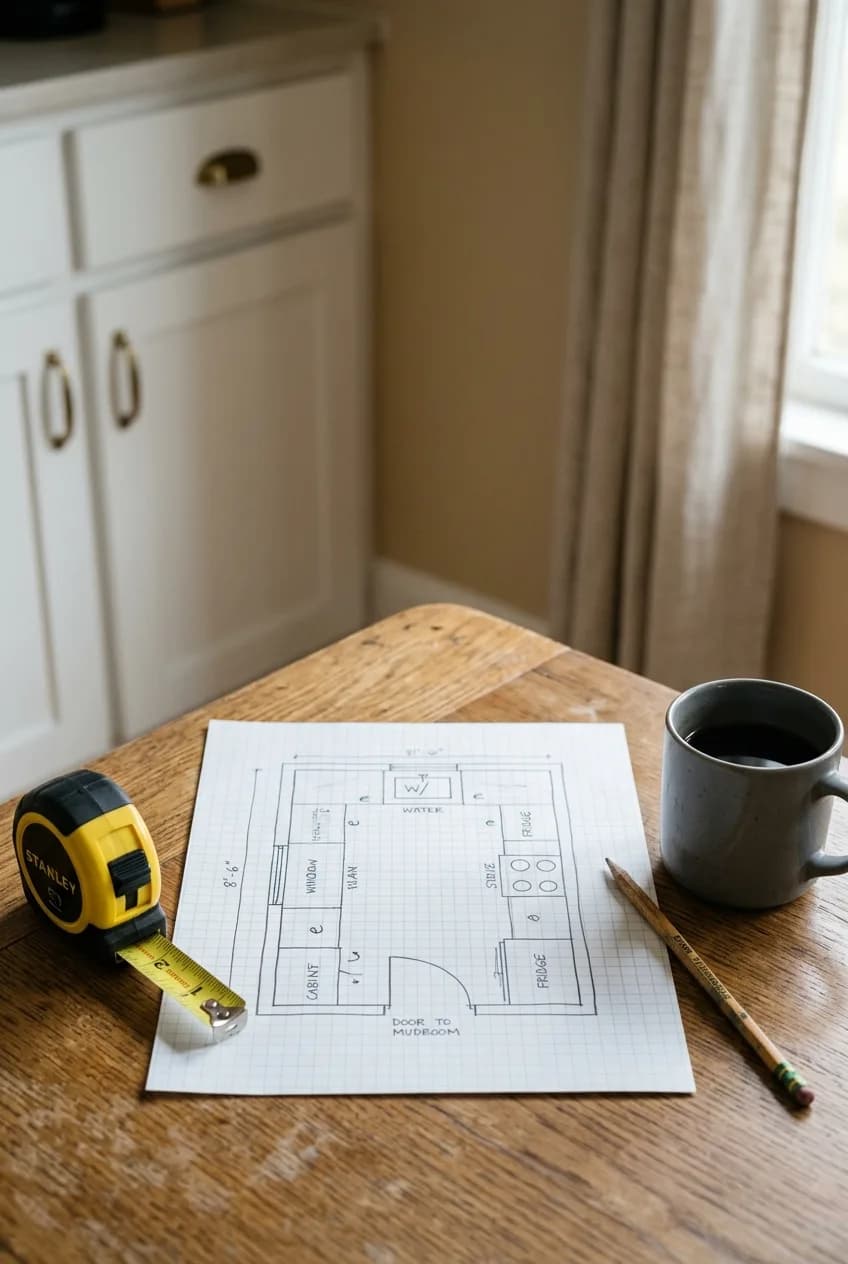
Before you even think about cabinet styles or countertop materials, you need to get intimately familiar with the space you have. This first step is the most critical; getting it right prevents major headaches down the road. It’s all about data gathering—for your room and for how you actually live.
Getting the Lay of the Land
Grab a tape measure, a pencil, and some graph paper. You don’t need fancy software. Start by drawing a simple, bird's-eye view of your kitchen. Measure each wall from corner to corner and write it down. Then, add the details:
- Windows and Doors: Measure their width and their distance from the nearest corner. Note which way doors swing.
- Ceiling Height: Measure from floor to ceiling in a couple of spots to check for variations.
- Utility Locations: Mark the exact locations of your water supply and drain (for the sink), your gas line (if you have one), and any major electrical outlets (for the stove and refrigerator). These can be moved, but it adds significant cost, so it’s best to work with them if possible.
Here’s a tip many people forget: don't just measure the kitchen itself. Measure the width of every doorway, hallway, and staircase leading to the kitchen. You need to ensure that big-ticket items like your new refrigerator and oven can physically make it into the room. It’s a heartbreakingly common mistake to find the perfect appliance only to realize it won't fit through the front door.
Your Kitchen Wish List: Needs vs. Wants
Now, think about what you truly need versus what you'd love to have. In a small kitchen, prioritization is everything. Be honest with yourself about how you cook and use the space. A 'needs vs. wants' list helps clarify your goals and your budget.
- Need: A functional refrigerator. Want: A French door model with an ice maker.
- Need: A reliable cooktop and oven. Want: A six-burner professional-style range.
- Need: Adequate counter space for meal prep. Want: A sprawling island with bar seating.
- Need: A place to put the trash. Want: A built-in dual-bin recycling center.
This list will become your guide when you have to make tough choices about where to allocate your space and money.
The Rules of the Room: Standard Dimensions
Kitchen design follows a set of standard measurements that ensure comfort and usability. Knowing these key numbers is essential for your layout plan. The most important ones to remember are:
- Counter Height: The standard height for kitchen counters is 36 inches from the floor.
- Counter Depth: Base cabinets are typically 24 inches deep, creating the standard countertop depth.
- Walkway Clearance: The path between counters or a counter and a wall should be at least 36 inches wide. If you can manage 42 inches in a one-cook kitchen, or 48 inches in a two-cook kitchen, it will feel much more comfortable.
- Upper Cabinet Spacing: There should be about 18 inches of space between your countertop and the bottom of your upper cabinets.
The Foundation: Understanding the Kitchen Work Triangle
You’ll hear designers talk about the “work triangle” all the time, and for good reason. It’s a time-tested principle that creates an efficient kitchen. Even in a tiny space, understanding the concept helps you create a layout that just *flows*.
What is the Work Triangle?
The work triangle is the imaginary line drawn between the three main work areas of your kitchen: the refrigerator (food storage), the stove (cooking), and the sink (cleaning and prep). The idea is to place these three elements in a way that minimizes the steps you take between them. In an ideal layout, the sum of the three sides of the triangle is between 13 and 26 feet, with no side being shorter than 4 feet or longer than 9 feet.
A good triangle means your workflow is smooth: you can take food from the fridge, move it to the sink to wash, then to a prep area next to the stove, all without running a marathon or bumping into obstacles.
Adapting the Triangle for Tight Spaces
What if your kitchen is too small for a classic triangle, like a single-wall layout? Don't worry. The modern interpretation of this rule is to think in terms of “work zones.” You still have your three main points, but you arrange them logically along a line or in a compact cluster. The goal remains the same: efficiency.
If you have to prioritize, focus on the relationship between the sink and the stove. This is the most important leg of the triangle. Most of your prep work—chopping vegetables, mixing ingredients—happens on the counter space between these two points. Keeping this path direct and providing ample counter space here (ideally at least 36 inches) will have the biggest impact on how easy it is to cook in your kitchen.
Choosing Your Fighter: Common Small Kitchen Layouts
While every kitchen is unique, most small layouts fall into one of three common categories. Understanding the pros and cons of each will help you determine the best fit for your room's shape and your personal needs.
The Galley Kitchen
More in Room Ideas
Gas Lift Bed vs. Drawer Storage: The Ultimate Guide for Small Bedrooms
Imagine a corridor with two parallel walls of cabinets and counters. This is the galley layout. It's incredibly efficient for a single cook because everything is within a few steps. It makes excellent use of space in long, narrow rooms.
The L-Shape Kitchen
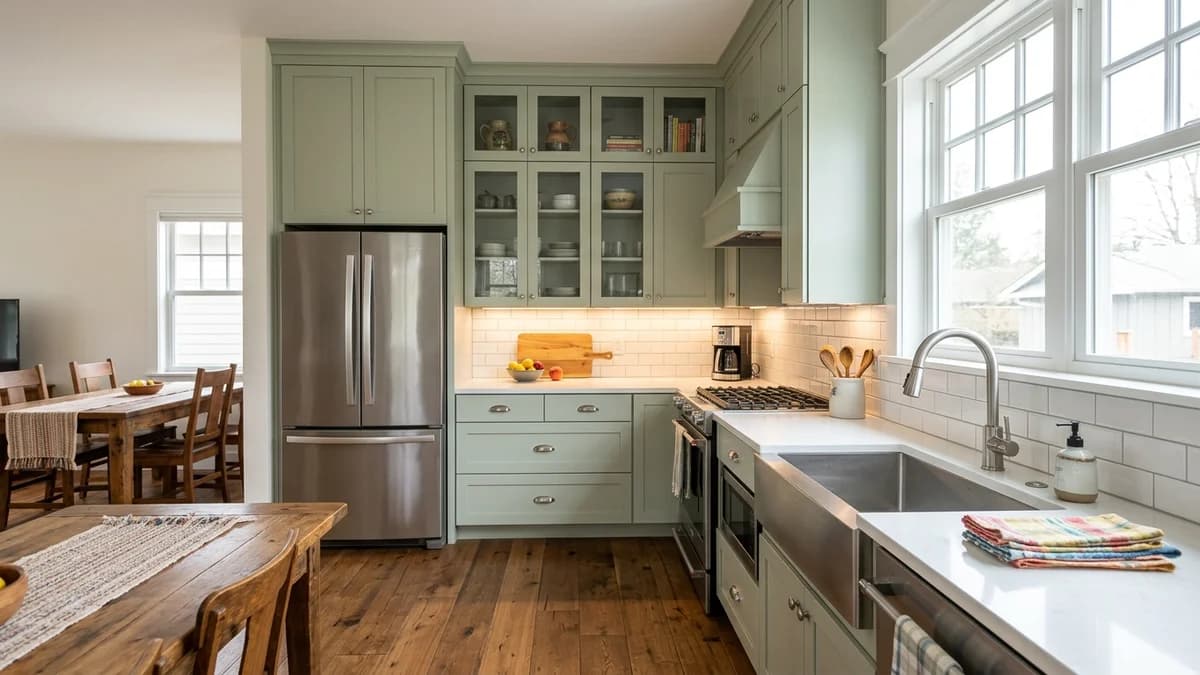
This layout uses two adjacent walls, forming an “L.” It’s a very popular choice for small to medium-sized kitchens because it creates a natural work triangle and opens up the remaining space, often allowing for a small dining table or connecting seamlessly to a living area. The corner can be tricky for storage, but it provides a good amount of continuous counter space.
One of the hidden benefits of the L-shape is that it’s often the most social layout. It naturally keeps foot traffic out of the main cooking area, so guests or family members can chat with you from the open side without getting in the way.
The One-Wall Kitchen
Just as it sounds, this layout places all cabinets, appliances, and counters along a single wall. It's the ultimate space-saver, frequently found in studio apartments or accessory dwelling units (ADUs). While it can't have a traditional work triangle, it can be very efficient if organized into clear work zones.
Layout | Best For... | Pros | Cons |
|---|---|---|---|
Galley | Long, narrow rooms | Extremely efficient workflow, maximizes cabinet and counter space for the footprint. | Can feel cramped, not ideal for multiple cooks, can become a thoroughfare if open at both ends. |
L-Shape | Square or open-concept spaces | Good work triangle, continuous counter space, keeps traffic out of the work zone. | Corner storage can be awkward and inefficient without smart solutions. |
One-Wall | Studios, lofts, very narrow spaces | Saves the most floor space, everything is easily accessible, cost-effective. | Limited counter and storage space, least efficient workflow. |
Maximize Every Inch: Smart Storage and Appliance Solutions
Once you've chosen a layout, the next step is to make every square inch count. In a small kitchen, smart storage isn't a luxury; it's a necessity. This is where you can get creative and find solutions that add function without adding bulk.
Think Vertically
Your walls are your greatest asset. Instead of standard upper cabinets, consider running them all the way to the ceiling. This not only provides extra storage for less-frequently used items (like that holiday platter or stand mixer) but also draws the eye upward, making the ceiling feel higher. In a very small space, you could also consider using open shelving instead of some upper cabinets to create a sense of openness and reduce visual weight.
Smarter Cabinets, Not Just More
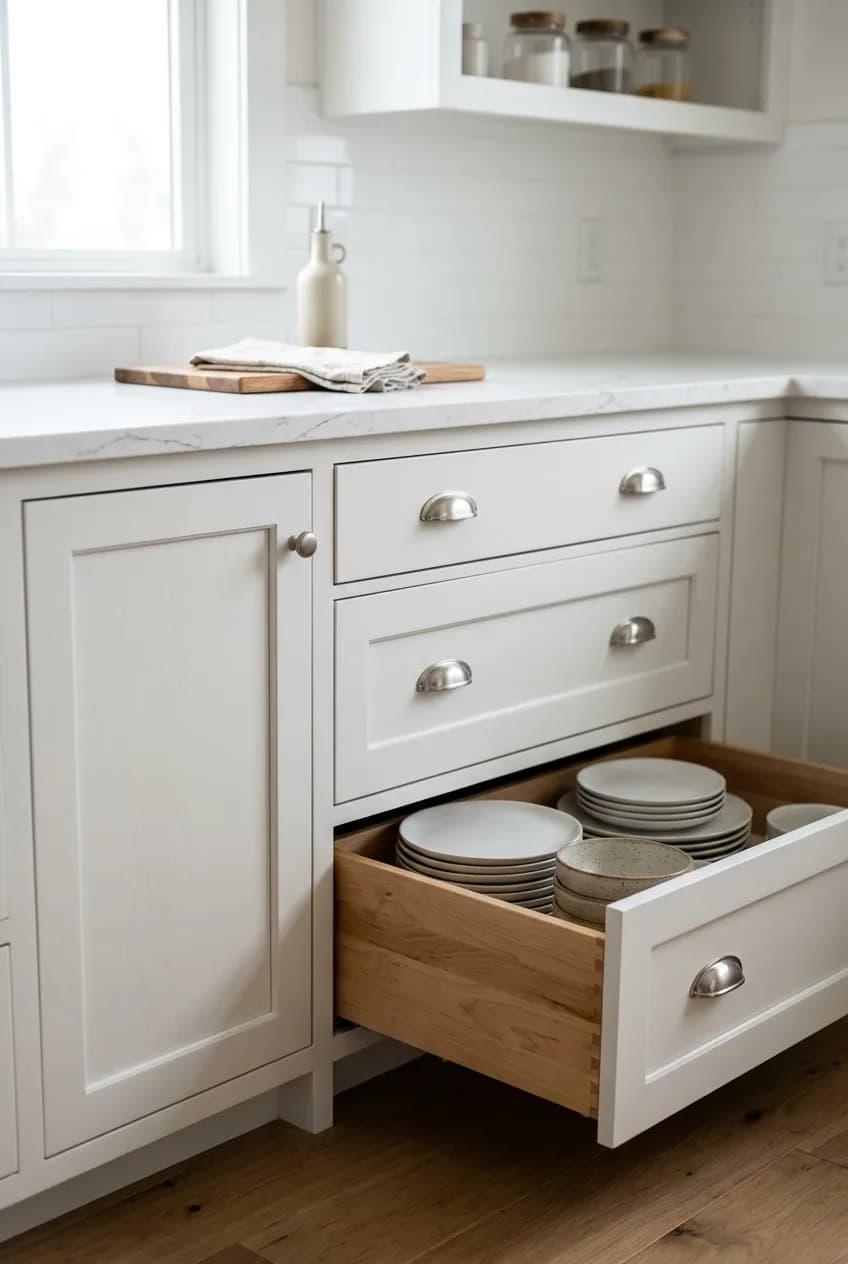
The inside of your cabinets matters as much as the outside. When planning your base cabinets, here's an insider tip: opt for as many deep drawers as you can instead of cabinets with doors. Drawers allow you to pull the entire contents of the cabinet out, giving you easy access to everything, even items in the very back. No more getting on your hands and knees to find a lost pot lid!
Also, plan for those awkward spaces. Corner cabinets can be fitted with a Lazy Susan or a pull-out carousel system to make them usable. Look for narrow, pull-out pantry cabinets that can tuck beside a refrigerator, or even consider toe-kick drawers—shallow drawers hidden in the baseboard, perfect for storing baking sheets, platters, or serving trays.
Right-Sized Appliances
Appliances are space hogs, but you have options. Look for “counter-depth” refrigerators that don't jut out past your counters, which can save you several inches of precious floor space. For very tight spots, slimline refrigerators (around 24 inches wide) are a great solution. You can also find compact dishwashers that are 18 inches wide instead of the standard 24 inches.
Consider appliances that do double duty. A convection microwave can serve as a second oven, perfect for cooking side dishes. An induction cooktop can, in a pinch, provide extra counter space when not in use since its surface is flat and cools quickly.
The Final Touch: Design Tricks to Create the Illusion of Space
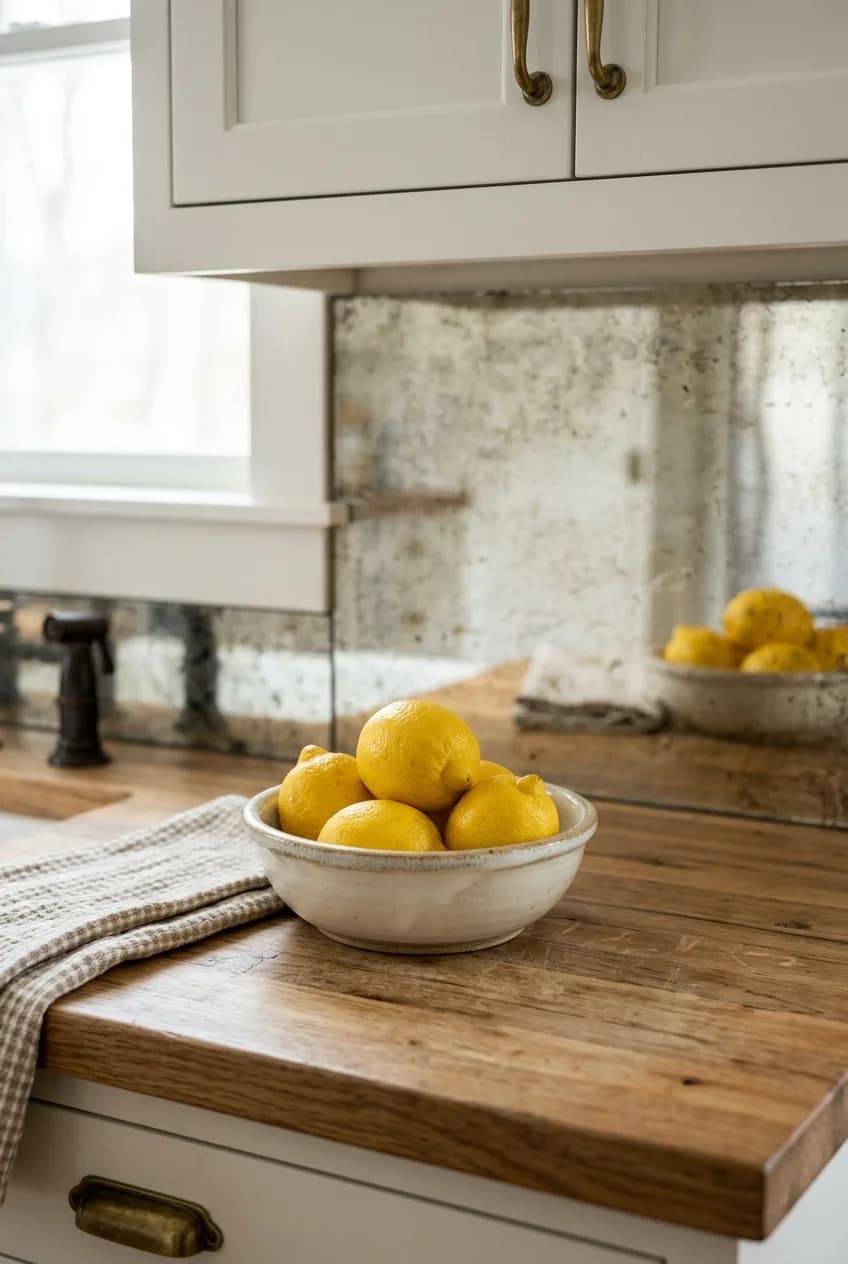
With the functional plan in place, you can turn to aesthetics. The right design choices can trick the eye, making your small kitchen feel significantly larger, brighter, and more welcoming. It's all about manipulating light and lines.
A light color palette is your best friend. Whites, creams, light grays, or pale blues on your walls and cabinets will reflect light and make the space feel airy and open. Pair this with reflective surfaces. A backsplash with glossy subway tiles, polished nickel or chrome cabinet hardware, and even shiny stainless steel appliances all help to bounce light around the room.
Speaking of light, don't skimp on it. A single, dim overhead light will make any kitchen feel like a cave. You need layers of light. Start with a good central fixture for overall ambient light. Then, add task lighting. Under-cabinet LED strips are non-negotiable; they illuminate your countertops, eliminating shadows and making prep work safer and more pleasant.
For a truly powerful illusion, consider a mirrored or highly reflective backsplash. It can be made from antiqued mirror tiles, polished stainless steel, or high-gloss acrylic. This one element can visually double the depth of your countertops and amplify any available light, making the entire kitchen feel wider and more expansive for a relatively low cost.
Finally, look down. If your kitchen opens into another room, like a dining or living area, using the same flooring throughout the entire space without a threshold will erase the visual boundary. This makes your kitchen feel like a part of a larger area, rather than a tiny, boxed-in room.