Does the front door swing open to reveal a pile of shoes, a tangle of bags, and a scattering of mail on the nearest flat surface? If your small entryway feels more like a chaotic drop zone than a welcoming entrance, you're not alone. It’s a common frustration in homes that lack a dedicated mudroom.
But here’s the good news: you don't need a whole separate room to reclaim your sanity. With a bit of thoughtful planning, you can transform even the tiniest entryway into a highly functional 'mudroom zone' that stops clutter before it spreads through your home. Forget the idea of a massive renovation; we’re talking about smart, practical solutions that work for real life.
This guide will walk you through everything, step-by-step, from figuring out what you actually need to choosing the right furniture and materials. Let’s get that entryway working for you.
Start Here: Defining Your Small Entryway's Mudroom Needs
Before you buy a single hook or basket, the most important step is to pause and observe. For the next few days, pay close attention to what actually happens when your family walks in the door. Where do keys get dropped? Where do backpacks land? Which shoes are kicked off most often? The goal here isn't to judge the mess, but to diagnose the problem so you can find the right cure.
The secret to success in a small space is ruthless prioritization. You likely can't fit a sprawling bench, ten cubbies, and a full closet. The goal isn't to build a full-scale room, but to create a 'mudroom zone' that solves your top 2-3 clutter problems. Don't try to solve everything at once. Focus on the biggest pain points first. Ask yourself: if you could only fix one thing, would it be the shoe pile or the coat heap?
Once you have your priorities, it's time to get practical. Grab a tape measure and get the exact dimensions of your space. Measure the width, depth, and height of the wall or corner you plan to use. Critically, don't forget to account for your door's swing path and the main walkway. You need to maintain a clear path of at least 36 inches for comfortable movement into your home.
- Shoe Storage: How many pairs need to live here day-to-day? Are they bulky boots or slim sneakers?
- Coat & Bag Hanging: Are you dealing with puffy winter coats or just light jackets and purses?
- Drop Zone: Do you need a dedicated spot for keys, mail, and sunglasses?
- Seating: Is a bench to sit on while putting on shoes a non-negotiable, or a nice-to-have?
- Hidden vs. Open Storage: Do you prefer everything tucked away behind doors, or are you okay with open hooks and shelves?
Think Vertically: Smart Storage for Tight Entryways
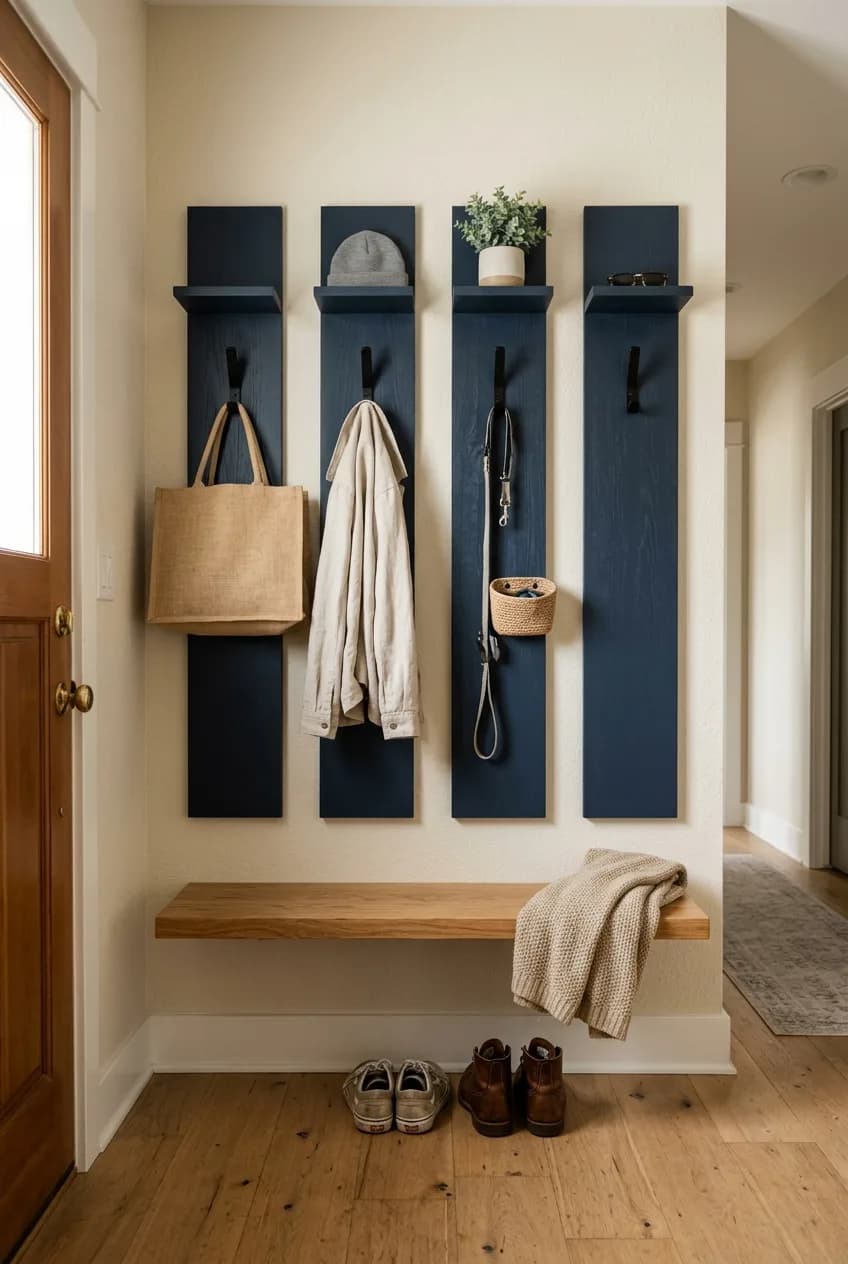
In a small entryway, the floor is prime real estate you can't afford to waste. The most effective strategy is to draw the eye upward and utilize your wall height. This not only provides more storage but also helps the space feel less cramped and more intentional.
Go Tall and Narrow
Instead of a wide, low console that eats up floor space, look for tall, slim pieces. Think of narrow locker-style units, which can offer each family member their own slim space for a bag and coat. Wall-mounted shelving systems or cubbies that go up to the ceiling are fantastic for storing baskets of seasonal gear like hats and gloves. Look for furniture with a depth of 15 inches or less to keep your walkway clear.
Embrace Double-Duty Furniture
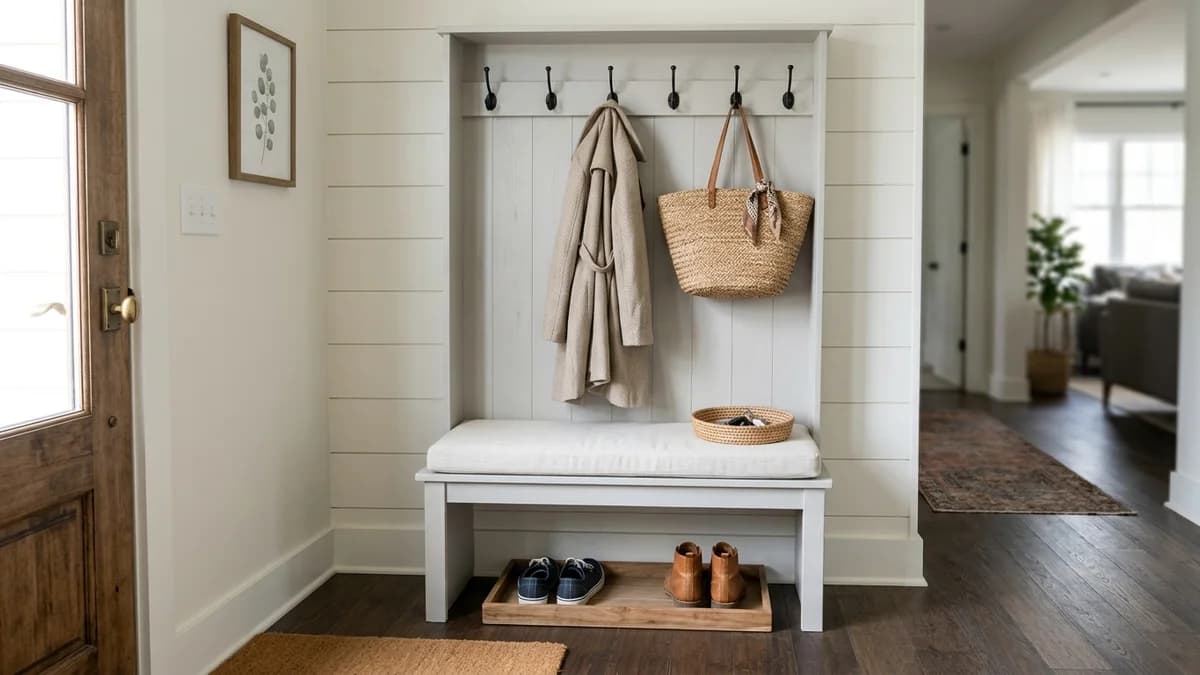
Every piece in a small mudroom zone should work hard. A storage bench is the classic example—it gives you a place to sit while also hiding shoes or bags inside. A slim console table can provide a surface for keys and mail, with room for storage baskets on a lower shelf. This is where you can use a great design trick: choosing 'floating' or leggy furniture.
Here's a non-obvious insight: Floating furniture, like a wall-mounted bench or console, creates the illusion of more floor space. By allowing you to see the flooring underneath, it makes a small entryway feel significantly larger and, as a bonus, makes it much easier to sweep or vacuum.
Get Everything Off the Floor
Floor clutter is the number one enemy of a small entryway. Wall-mounted solutions are your best friend. A simple row of sturdy hooks is often more space-efficient for everyday coats than bulky hangers in a closet. A pegboard system offers incredible flexibility for hanging keys, bags, and even small baskets. For shoes, which are often the biggest culprit, consider slim, wall-mounted tip-out cabinets (like the popular IKEA TRONES). They have a tiny footprint but can hold several pairs of shoes, keeping them completely out of the walkway.
More in Room Ideas
Murphy Bed vs. Regular Bed: How to Decide Which Is Right for You
Built-in vs. Freestanding: Choosing the Right Approach
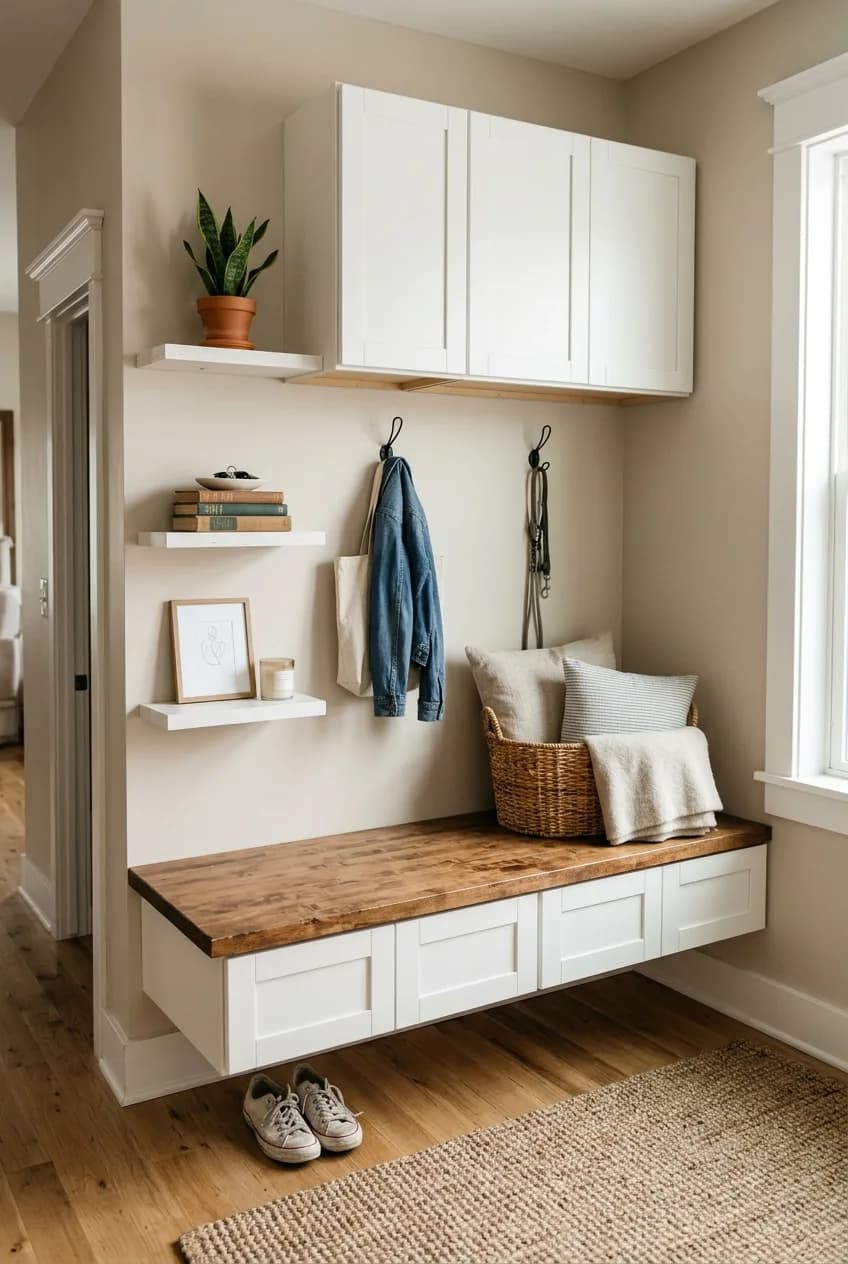
One of the bigger decisions you'll make is whether to go for a custom built-in solution or use freestanding furniture. There's no single right answer—it depends entirely on your budget, your space, and how long you plan to stay in your home.
Built-ins offer a seamless, high-end look that is perfectly tailored to your space, which is a huge advantage for awkward nooks or alcoves where standard furniture just won't fit. However, they are a permanent installation and come with a significantly higher price tag. Freestanding pieces, like a hall tree or a bench and shelf set, are more budget-friendly, flexible if you decide to rearrange, and you can take them with you when you move.
Factor | Built-in Solution | Freestanding Solution |
|---|---|---|
Cost | Higher ($2,000 - $7,000+) | Lower ($200 - $1,500) |
Flexibility | Permanent | Can be moved or replaced easily |
Appearance | Seamless, custom, integrated look | Can look like separate pieces of furniture |
Best For | Awkward spaces, long-term homes, specific storage needs | Standard spaces, renters, budget-conscious planners |
Want a custom look without the custom price? Here’s an insider tip: you can achieve a high-end 'built-in' look by using standard-depth upper kitchen cabinets. These are typically only 12-15 inches deep, making them perfect for narrow entryways. Mount a row of them on the wall a foot or so off the ground to create a floating bench or console base. Then, add a custom-cut wood top (like butcher block from a home improvement store) that spans the cabinets for a polished, seamless look.
Choosing Materials That Withstand Daily Wear and Tear
An entryway is a high-traffic, high-impact zone. It has to stand up to wet boots, muddy paws, dropped bags, and scuffed walls. Choosing durable, easy-to-clean materials from the start will save you a lot of headaches later.
For flooring, you want something that's not afraid of a little water or dirt. Luxury Vinyl Plank (LVP) is an excellent choice as it's waterproof and incredibly scratch-resistant. Porcelain or ceramic tile is the toughest option available and is completely unfazed by moisture. If replacing your floor isn't an option, invest in a high-quality, oversized entry mat. Look for one with a rubber backing that can be hosed off outside.
When it comes to your walls, paint sheen matters more than you think. A matte or flat finish will show every single scuff and fingerprint and is difficult to clean. Opt for a semi-gloss or at least a satin/eggshell finish. These sheens have a slight luster that makes them durable and wipeable, so you can easily clean off dirt smudges without ruining your paint job.
If you're adding a cushion to a bench, treat it like outdoor furniture. Look for performance-grade fabrics (like Sunbrella) that are designed to resist water, stains, and fading. These fabrics are easy to spot-clean and will look great for years, even with daily use.
Finally, don't overlook a crucial but often forgotten material: light. A dim, shadowy entryway will always feel smaller and more cluttered than it is. A bright, well-placed fixture is a must. Swap out that dated fixture for a modern flush-mount ceiling light or a stylish wall sconce. Good lighting is not only crucial for making the space feel larger, but it's also incredibly practical for finding that missing glove on a busy morning.
Putting It All Together: 3 Layouts for Common Entryways
The most effective layout does more than just hold your stuff; it helps direct traffic flow. Always arrange your mudroom elements along the side of the entryway that doesn't obstruct the main path into your home. You want to be able to walk in, drop your things, and keep moving without having to sidestep a bench or a pile of shoes. Here are a few ideas for common entryway shapes.
Layout 1: The 'Long, Narrow Hallway' Solution
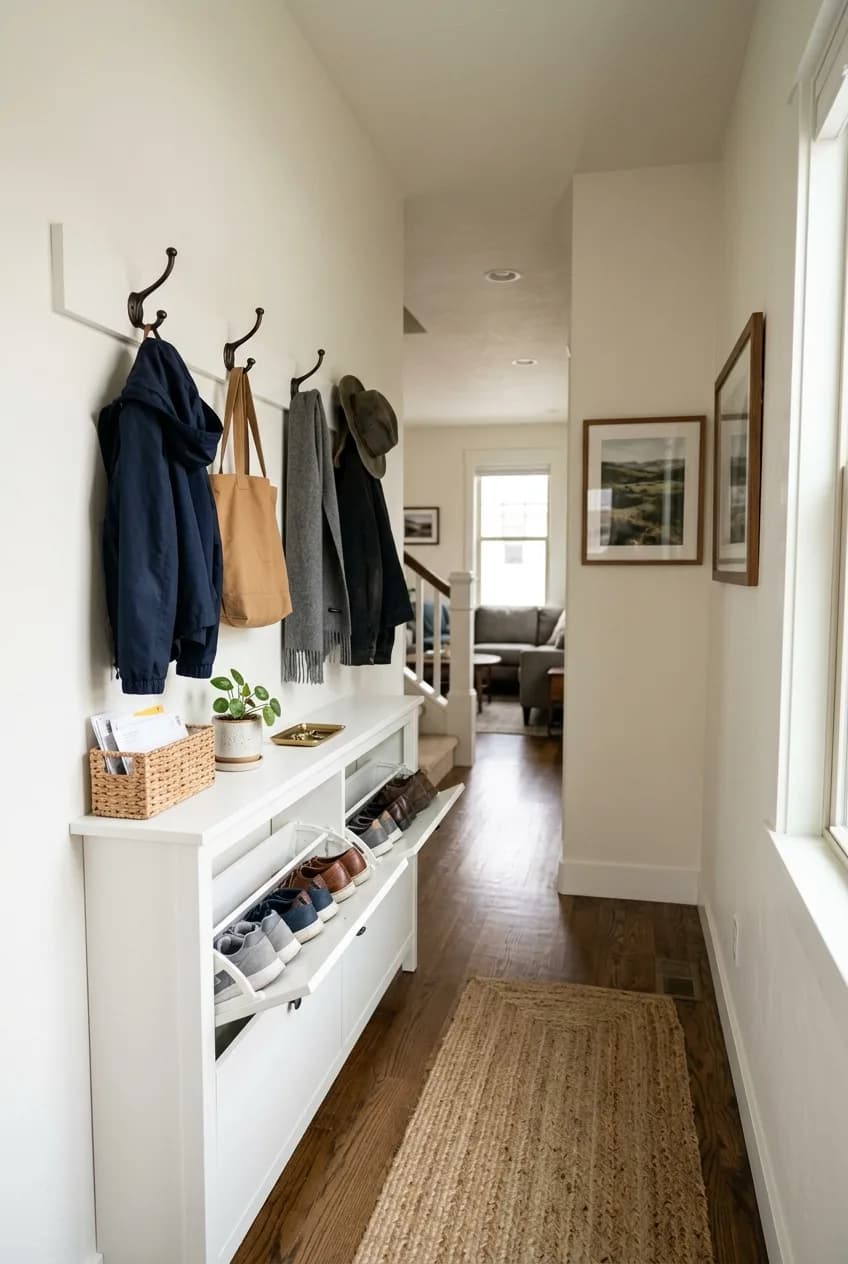
For a hallway-style entry, every inch of depth counts. The key is to keep everything ultra-slim and on one wall. Start with a very narrow console table, no more than 10-12 inches deep. Above it, mount a long board with a row of hooks for coats and bags. Below the console, install a series of shallow, wall-mounted shoe cabinets. This keeps the entire floor clear and maintains the widest possible walkway.
Layout 2: The 'Just a Wall by the Door' Solution
If your front door opens directly into a living room or open-plan space, you need to visually define the 'entryway.' A compact, all-in-one hall tree is perfect for this. It combines a bench, hooks, and an upper shelf into a single piece of furniture, creating a clear zone. Alternatively, you can create your own by placing a small bench against the wall and then installing a matching shelf with hooks mounted directly above it. This creates a vertical 'column' that signals 'this is where the entry stuff goes.'
Layout 3: The 'Awkward Corner' Solution
Don't see that unused corner by the door as a problem—see it as an opportunity. A corner is a natural spot to contain clutter. A simple L-shaped corner bench (either purchased or DIY'd) can maximize seating and storage. Above the bench, install a few floating shelves that wrap around the corner. Use these for decorative baskets to hold keys, sunglasses, and other small items, keeping the bench surface clear.