Building your first raised garden bed is an exciting step. It’s a promise of fresh vegetables, fragrant herbs, and beautiful flowers, all neatly contained and easy to manage. But there’s a common story that often follows this initial burst of enthusiasm: just a few years down the line, the corners of that beautiful wooden bed start to get soft. The wood darkens, splinters, and bows outward. Before you know it, you’re looking at a pile of rotting lumber and facing a total rebuild.
It doesn't have to be this way. The difference between a raised bed that lasts three years and one that lasts fifteen isn't about luck; it's about a few key decisions and techniques that are often overlooked in standard DIY guides. This isn't just another plan for a simple box. This is a definitive guide to building a 'forever' bed—one designed from the ground up to defeat rot, saving you the future headache, cost, and wasted effort of doing the job twice.
Why Your First Raised Bed Should Be Your Last
So, what’s the great enemy of a wooden raised bed? It’s not what most people think. We tend to worry about rain, snow, and the elements beating down on the wood from above. While that plays a role, the real killer is the constant, relentless moisture coming from two other directions: the ground below and the soil inside.
Your garden soil is a living ecosystem, full of moisture-retaining organic matter. When you pack that damp soil against untreated wood, it never has a chance to fully dry out. Wood-eating fungi and bacteria thrive in these conditions. The base of the bed, sitting directly on the damp earth, wicks up groundwater like a sponge. This persistent moisture is far more destructive than a rainstorm.
Having to tear down a rotted bed and replace it isn't just an inconvenience. Think about the hidden costs: the price of new lumber (which is never getting cheaper), the hours spent rebuilding, and worst of all, the disruption to your garden and planting schedule. The core principle for a long-lasting bed is simple: choose a rot-resistant material and, most importantly, create a barrier that breaks the wood's contact with the moisture-rich ground.
The Great Material Debate: What's Truly Rot-Proof?
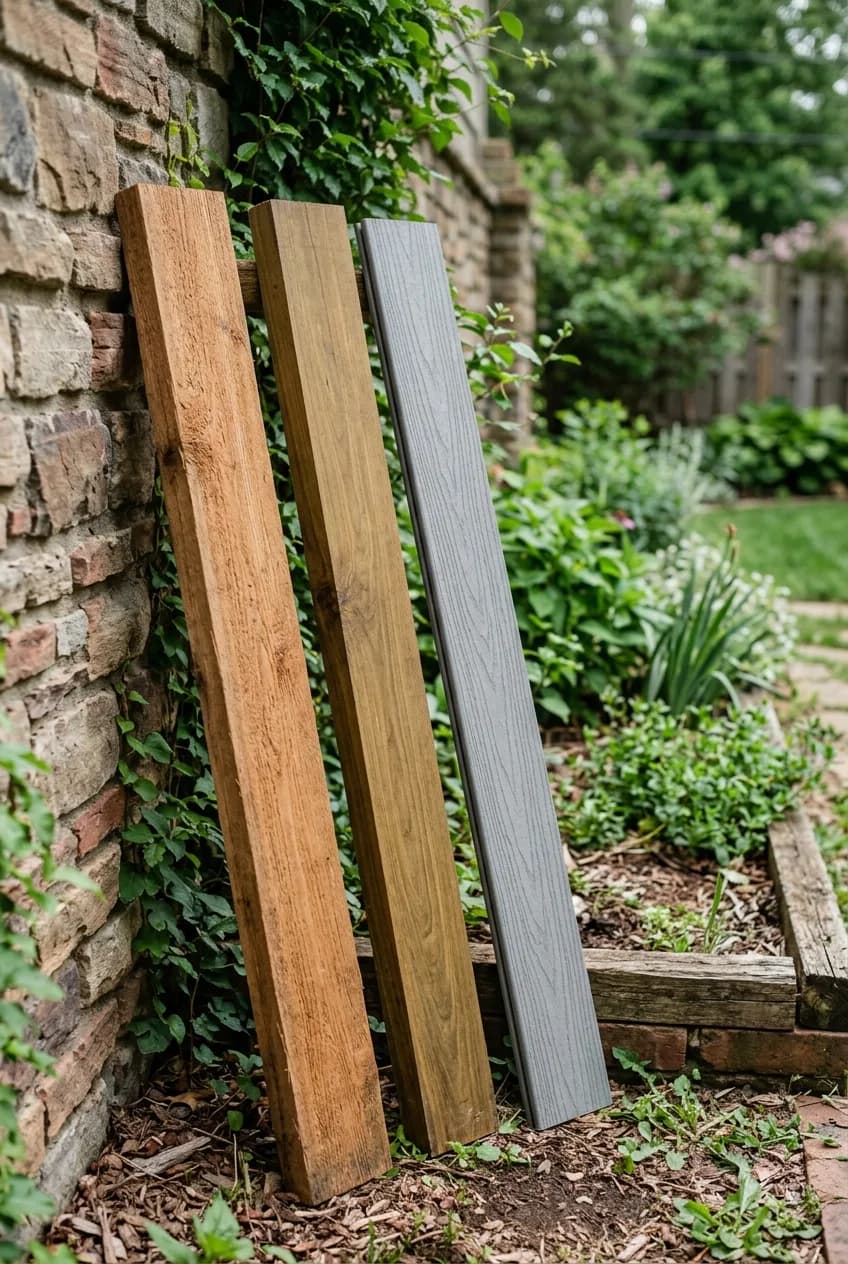
When you’re building a bed to last, material choice is everything. A standard pine 2x6 from the hardware store might be cheap, but it will start to degrade almost immediately. You need to be more selective.
Naturally Rot-Resistant Woods
Certain woods contain natural oils and compounds that make them highly resistant to decay and insects. The key is to make sure you're buying 'heartwood'—the dense, dead, central part of the tree—as the lighter-colored 'sapwood' from the outer layers doesn't share these resistant qualities.
- Cedar: The popular choice for a reason. Western Red Cedar is lightweight, stable, and naturally very resistant to rot. It's what most high-quality raised bed kits are made from.
- Redwood: Similar to cedar in its rot resistance, redwood is a beautiful and durable option, though it can be more expensive and less available depending on your location.
- Black Locust: This is the unsung hero of rot-proof wood. It’s a domestic hardwood that’s incredibly dense and can last for decades, even with direct ground contact. It’s heavier and harder to work with than cedar, and can be tough to source, but its longevity is legendary among farmers and fence-builders.
Wood Alternatives
If you want to bypass wood altogether, there are several excellent, long-lasting alternatives.
Material | Pros | Cons | Typical Lifespan |
|---|---|---|---|
Galvanized Steel | Extremely durable, modern look, won't rot or warp. | Can get hot in full sun, higher upfront cost, can have sharp edges. | 20+ years |
Composite Decking | Made from recycled plastic and wood fibers, completely rot-proof, comes in various colors. | Expensive, can be heavy, some concerns about plastics near food gardens. | 25+ years |
Concrete Blocks | Inexpensive, readily available, will never rot. | Heavy and labor-intensive to install, can leach lime into the soil (raising pH). | 50+ years |
A Note on Pressure-Treated Lumber
What about the green-tinted wood at the home improvement store? For decades, pressure-treated wood was infused with arsenic (CCA), making it unsafe for garden use. That formula was phased out for residential use in the early 2000s. Modern pressure-treated wood uses copper-based compounds (like ACQ or MCA) and is considered safe for garden use by most university extension programs. However, if you prefer to be extra cautious, it's still best to stick with a naturally resistant or non-wood option for peace of mind.
The Unsung Hero: Building a Rot-Proof Foundation
You could build your bed out of the most expensive redwood, but if you just plop it down on the bare ground, you’re still losing half the battle. Elevating the wood frame, even by just an inch or two, is the single most effective trick to dramatically extend its life.
Why Elevation Is Everything
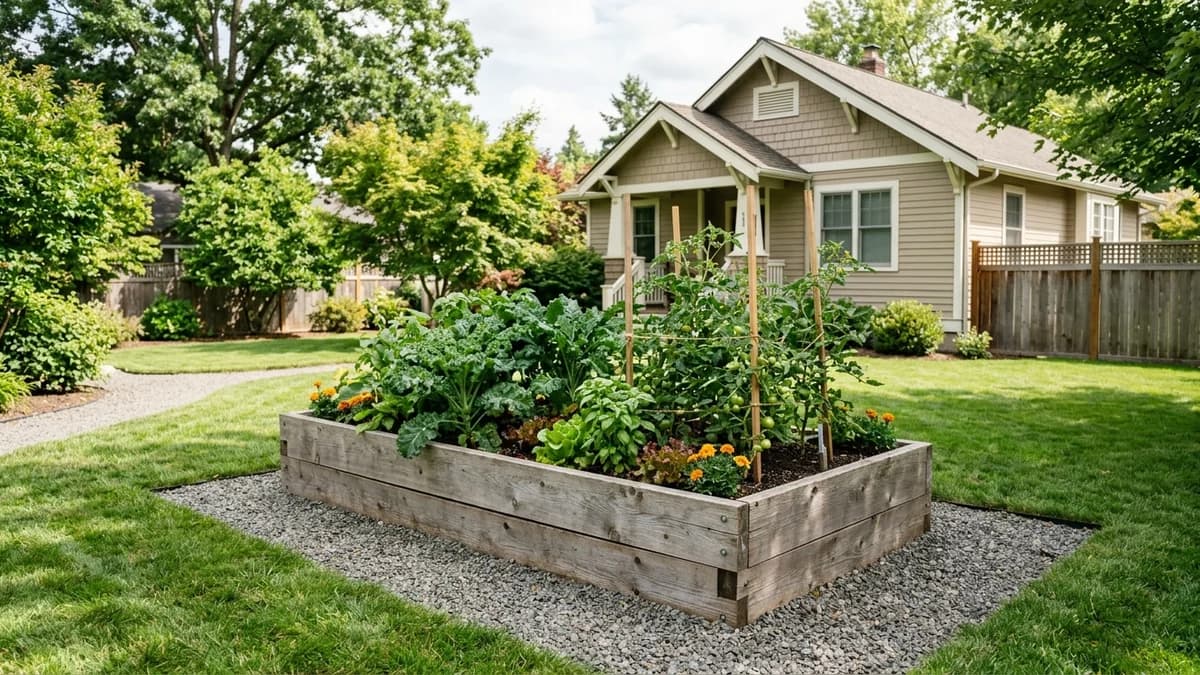
The goal is to create a 'capillary break.' This is a fancy term for a simple concept: preventing ground moisture from wicking its way up into the wood. By placing a layer of coarse material like gravel underneath the frame, you create an air gap that water can't easily cross. This allows the base of your raised bed to dry out completely between rains, stopping rot before it can ever start.
Creating a Simple Gravel Trench Foundation
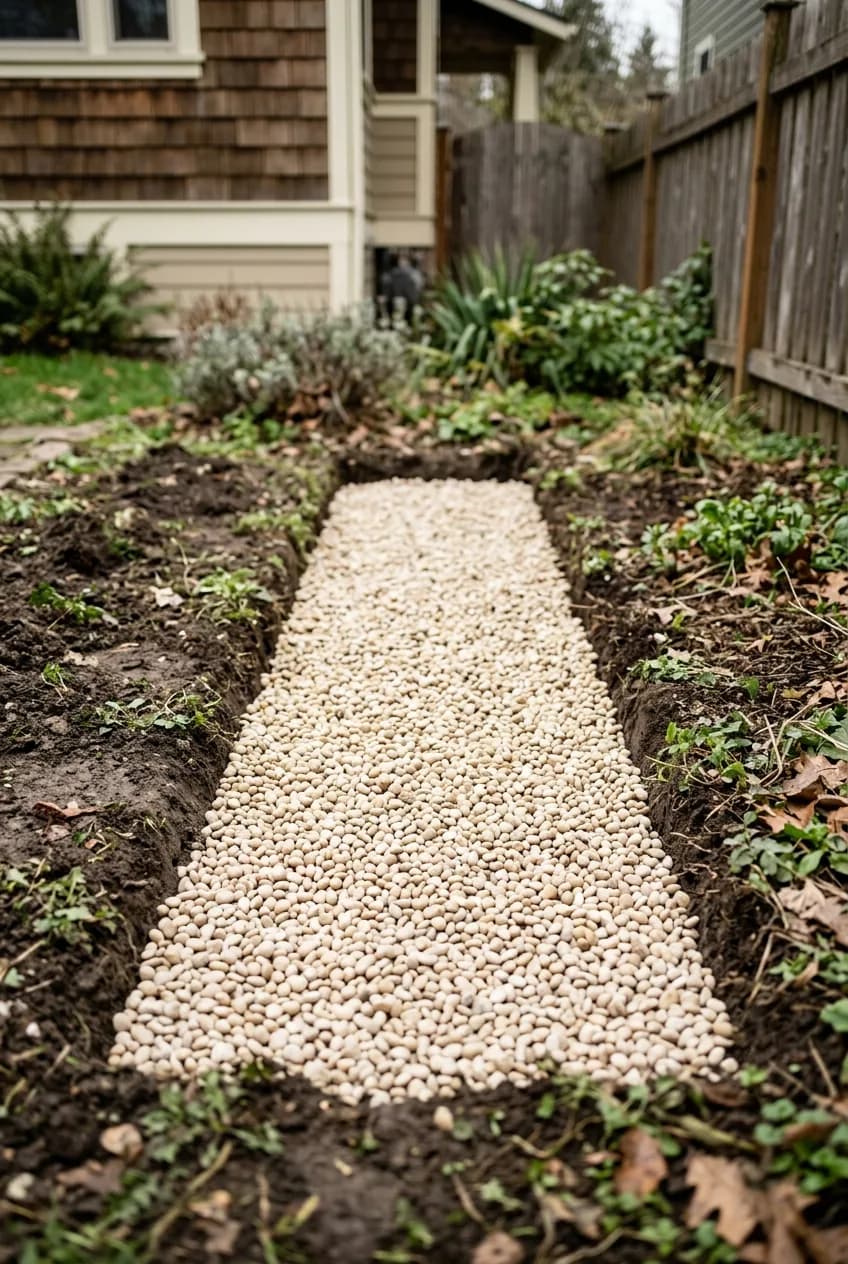
This sounds complicated, but it's incredibly easy and costs very little. For a step that can easily double your bed's lifespan, the return on investment is huge.
More in DIY
When to Sand Between Coats of Paint for a Flawless Finish
- Mark Your Footprint: After you decide on the location for your bed, lay out the first layer of your frame on the ground to mark its exact footprint.
- Dig the Trench: Move the frame aside and, using a flat spade, dig a shallow trench about 4 inches wide and 2-3 inches deep directly where the walls of the frame will sit.
- Fill with Gravel: Fill the trench to the top with pea gravel or any other small, crushed stone. Rake it level.
- Set Your Bed: Place your assembled raised bed frame directly on top of this gravel footing. That's it. You've just built a foundation that will keep the wooden base dry for years to come.
Alternative Foundations
Don't want to dig? Another easy option is to place a concrete paver or a solid concrete block under each corner of the bed. This lifts the entire frame off the ground, promoting air circulation and drainage underneath. It's a great choice if you're building on an existing patio or a very hard-packed area.
Smart Construction: Assembly Tricks That Prevent Decay
How you put the bed together matters just as much as what it's made of. A few small details during assembly can make a big difference in preventing moisture from getting trapped in the joints and seams.
First, your fasteners are critical. Standard galvanized screws will rust and fail within a couple of seasons, creating weak spots. You absolutely must use either stainless steel or ceramic-coated deck screws. They cost more, but they will not corrode, ensuring your bed remains structurally sound. That same fastener logic applies to any garden structure that has to bear serious weight outdoors — our comparison of store-bought vs. DIY garden trellises digs into why weak screws and welds are usually the first thing to fail.
Next, let's talk about lining the bed. This is where a very common mistake happens. Many people line their beds with impermeable black plastic sheeting, thinking they are protecting the wood from the soil. In reality, they are trapping moisture against the wood. Any water that gets between the plastic and the wood has no way to evaporate, creating a perfect, rot-friendly environment. If you choose to line your bed—to prevent soil from seeping through gaps, for instance—use a breathable, permeable garden fabric. This holds the soil in but allows water to pass through and the wood to dry out.
Finally, focus on strong corners. A simple lapped joint, where the end of one board butts up against the face of the connecting board, is strong, easy to assemble, and minimizes complex cuts that can trap water. Pre-drilling your screw holes also matters, especially with dense woods like Black Locust, as it prevents the wood from splitting and ensures a tight, secure fit that won't leave gaps for moisture.
Your Step-by-Step Build Plan (A 4x8 Cedar Example)
Let’s put it all together. Here’s a plan for a classic 4-foot by 8-foot bed that’s 11 inches deep, using two layers of standard 2x6 cedar boards. This size is great because it’s wide enough for plenty of plants but narrow enough that you can reach the center from either side without stepping on the soil.
Tools & Materials List
- Lumber: Four 8-foot 2x6 cedar boards, and two 8-foot 2x6 cedar boards (which you will cut in half to make the 4-foot ends).
- Corner Posts: One 6-foot 4x4 cedar post, to be cut into four 18-inch sections.
- Fasteners: A box of 3-inch exterior-rated stainless steel or ceramic-coated deck screws.
- Foundation: Several bags of pea gravel.
- Tools: Tape measure, pencil, circular saw or miter saw, power drill with bits for pre-drilling and driving, and a level.
Cutting & Assembly Guide
- Make your cuts: Cut the 6-foot 4x4 post into four equal 18-inch pieces. These will be your interior corner supports. Cut the two 8-foot 2x6 boards exactly in half to get four boards that are 4 feet long.
- Assemble one long side: Lay two 8-foot boards on a flat surface. Place a 4x4 post at each end, flush with the top and end of the boards. Pre-drill and drive two screws through the boards into each post.
- Attach the short sides: Stand the assembled long side up. Attach two of the 4-foot boards to the exposed face of one of the 4x4 posts. Ensure the corners are square. Repeat on the other end.
- Complete the box: Attach the second assembled 8-foot side to complete the rectangle. You should now have a sturdy frame with the 4x4 posts on the inside of the corners.
- Add a center brace (optional but recommended): For an 8-foot bed, it's wise to add a brace in the middle to prevent bowing. You can screw a small piece of 2x4 across the top center or run a piece of wood connecting the two long sides halfway down.
Placement & Filling the Smart Way
With your frame built, prepare your gravel trench foundation as described earlier. With a helper, move the bed into place and use a level to ensure it's sitting evenly on the gravel. Now for the fun part: filling it.
Don't rush out and buy 30 cubic feet of expensive bagged garden soil. This is a perfect opportunity to use the Hugelkultur or 'lasagna gardening' method. Fill the bottom third of your deep, new bed with organic waste materials. Things like old logs, thick branches, twigs, leaves, and straw work perfectly. This material will slowly decompose over years, creating a nutrient-rich, moisture-retentive sponge at the base of your bed. Top this layer with compost and a high-quality raised bed soil mix. This trick saves a surprising amount of money and builds long-term soil health from the bottom up.